Oh, the magic of fresh pasta! There’s just something so incredibly satisfying about transforming a few simple ingredients – flour, eggs, a little salt – into silky ribbons of deliciousness right in your own kitchen. I’m Maya Stevens, and I remember my first time making pasta by hand. It was in a cozy farm-to-table kitchen, and watching those golden strands come together felt like creating pure edible art. If you’ve ever dreamed of making your own, you’re in the right place! These Homemade Pasta Recipes Step By Step are designed to guide you through every single toss, knead, and roll. Trust me, it’s easier than you think, and the flavor? Oh, it’s miles beyond anything from a box. My passion is helping home cooks like you discover this joy, and I can’t wait to share this incredibly rewarding process with you.
Why You’ll Love These Homemade Pasta Recipes Step By Step
Making your own pasta is such a rewarding experience, and honestly, it’s not nearly as complicated as you might think! Here’s why you’ll fall in love with this method:
- Incredibly Easy to Master: We break down each step, so even if you’ve never touched pasta dough before, you’ll feel confident.
- Seriously Delicious Results: Fresh pasta just tastes better, plain and simple. It’s got this amazing texture that store-bought just can’t match.
- Perfect for Family Dinners: Get the kids involved! It’s a fun activity and everyone loves digging into a meal they helped create.
- Totes Satisfying: There’s a special kind of pride that comes from making something so beautiful and tasty completely from scratch.
Gather Your Pantry Staples for Homemade Pasta
Alright, let’s get down to business! Making fantastic pasta starts with having the right ingredients right there in your kitchen. Don’t worry, these are all super common pantry staples that most of us already have on hand. The beauty of homemade pasta is its simplicity, and using good quality basics really makes a difference. So, let’s gather everything we need to make a perfect dough. It’s all about getting that balance just right!
Ingredients for the Pasta Dough
For this basic, beautiful pasta dough, you’ll need:
- 9 ounces all-purpose flour, plus more for dusting
- 2 whole large eggs (about 110g total)
- 4 large egg yolks (about 70g total)
- 1 teaspoon kosher salt, plus more for salting the cooking water
Step-by-step Guide to Homemade Pasta Recipes
Alright, this is where the magic really happens! These Homemade Pasta Recipes Step By Step are going to walk you through making amazing pasta from scratch. Don’t sweat it if it’s your first time; we’ll take it slow and steady. I learned from the best, and I want you to feel that same confidence as you create something beautiful and delicious. It’s all about the touch, the feel, and a little patience. Let’s dive into transforming those simple ingredients into something extraordinary! For more inspiration on really savoring every moment in the kitchen, check out our guide to transforming your kitchen experience.
Making the Pasta Dough
First things first: pour your flour onto a nice, clean workspace. Make a good-sized well in the middle – think of it like a little volcano crater! Crack your whole eggs and yolks right into that well, and add your salt. Now, grab a fork and start whisking those eggs and salt together in the center. Gradually, you’ll start pulling in the flour from the sides of the well. Keep going until you have a messy, sticky dough. It’s at this point you might feel like it’s a lost cause, but trust me, it’s not! Just keep gently incorporating it all.
Kneading and Resting the Dough
Now comes the most important part for that perfect pasta texture: kneading! Use the heel of your hand to push and stretch the dough away from you, then fold it over and give it a little turn. Repeat this process. You’re building up that gluten, which is what gives pasta its lovely chew. Add a tiny bit of flour if it’s too sticky, or a spritz of water if it feels too dry. Keep going until it’s smooth and elastic, like a firm ball of Play-Doh. Once it feels just right, wrap it up tight in plastic wrap and let it rest on the counter for at least 30 minutes. This lets the gluten relax, making it super easy to roll later.
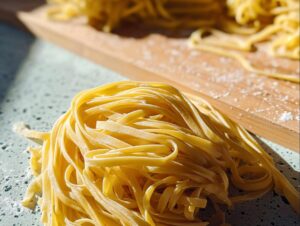
Rolling and Shaping Your Homemade Pasta
After your dough has had a nice little snooze, unwrap it and cut it into four pieces. Keep the portions you’re not working with wrapped. Lightly dust your work surface and a piece of parchment paper. Flatten one piece of dough with your rolling pin into a rough oblong shape. If you have a pasta maker, set it to the widest setting and feed the dough through it a few times. Then, fold the dough in thirds (like a letter!) and pass it through the widest setting again, a few more times. This really helps smooth it out. Gradually decrease the roller setting, passing the dough through once at each setting until it’s nice and thin. You want it to feel delicate and slightly see-through. If you don’t have a machine, just keep rolling with your rolling pin until you get it super thin and even.
Cutting Noodles for Your Recipe
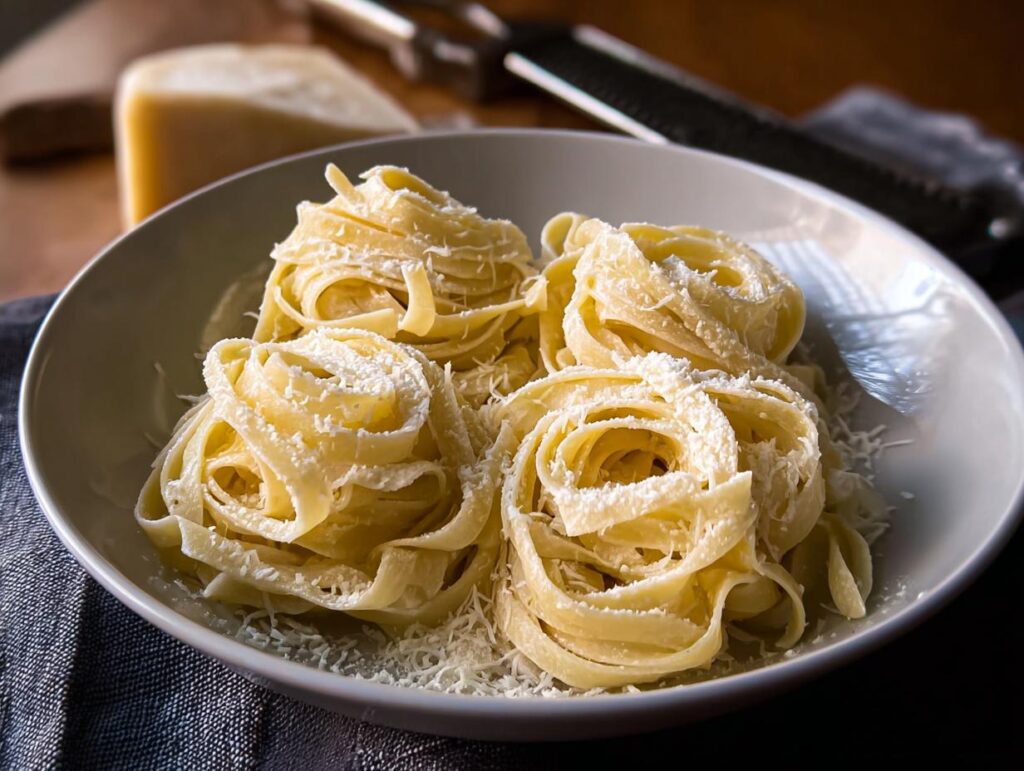
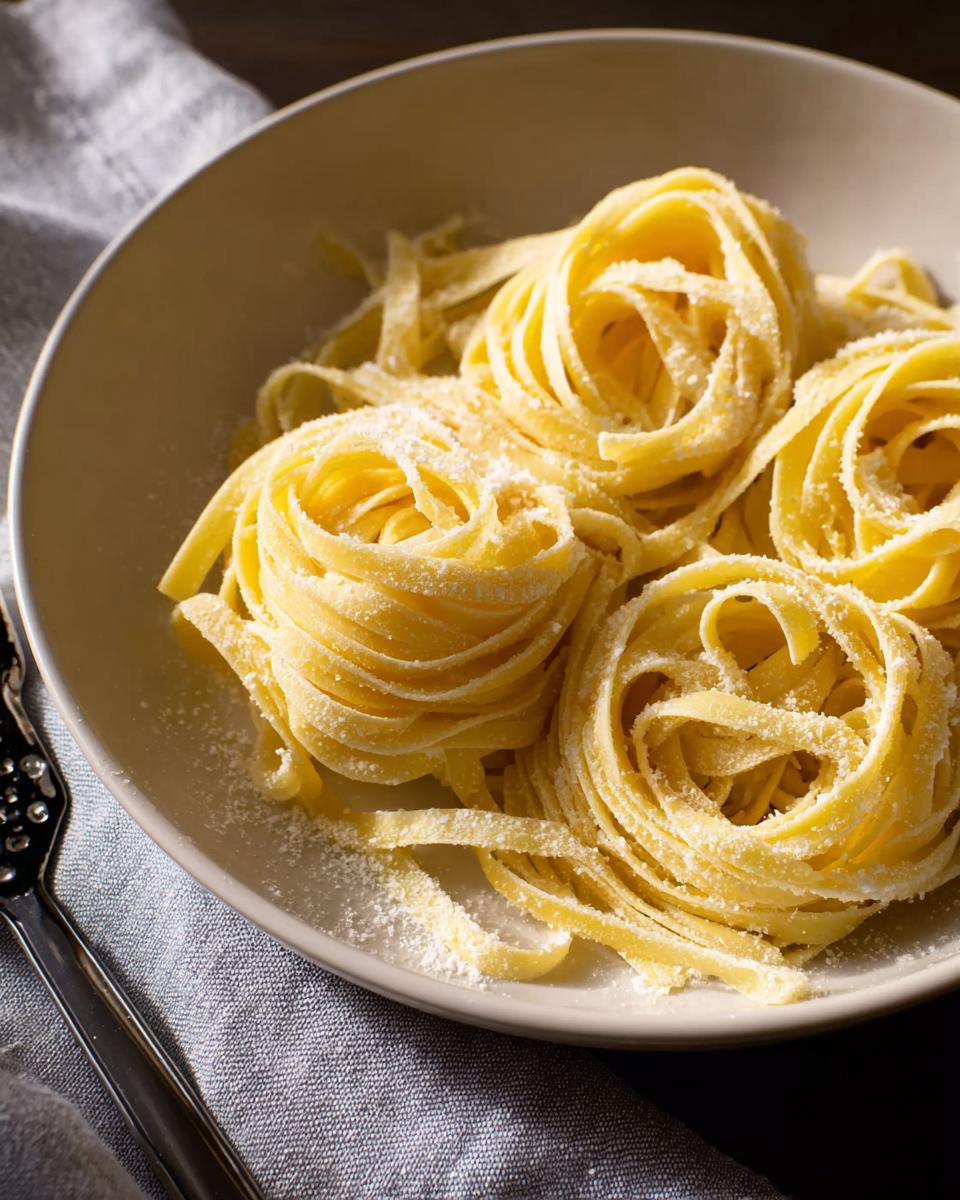
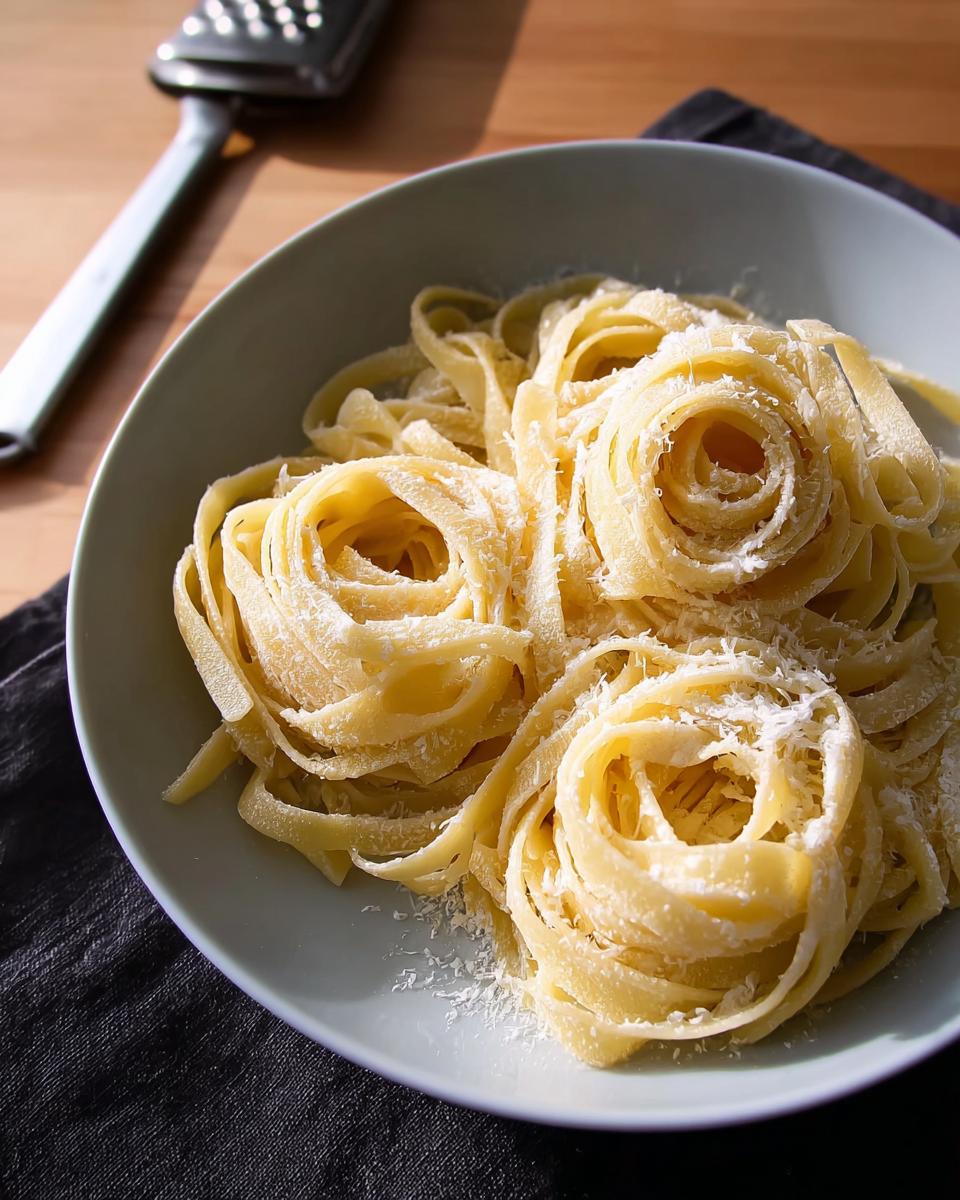
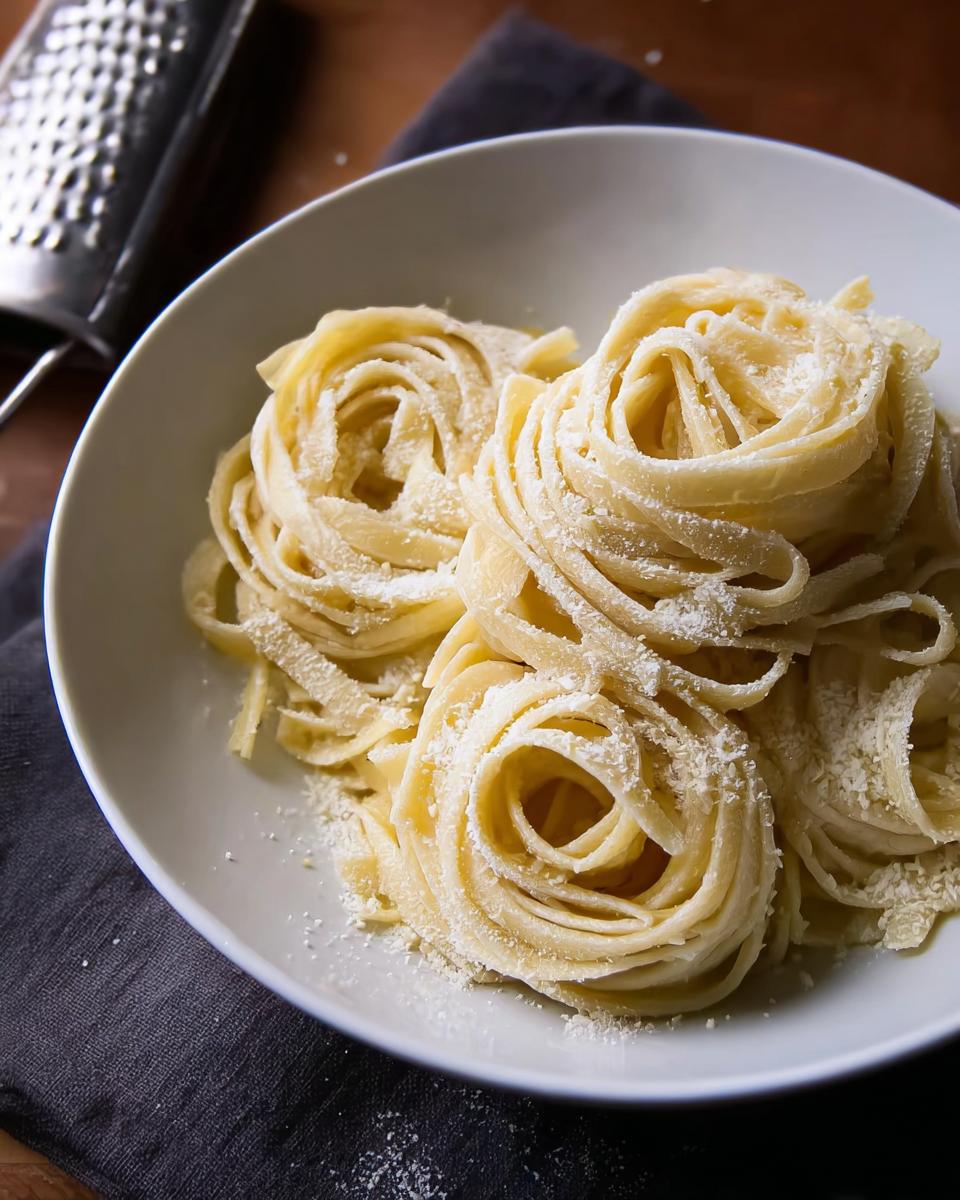
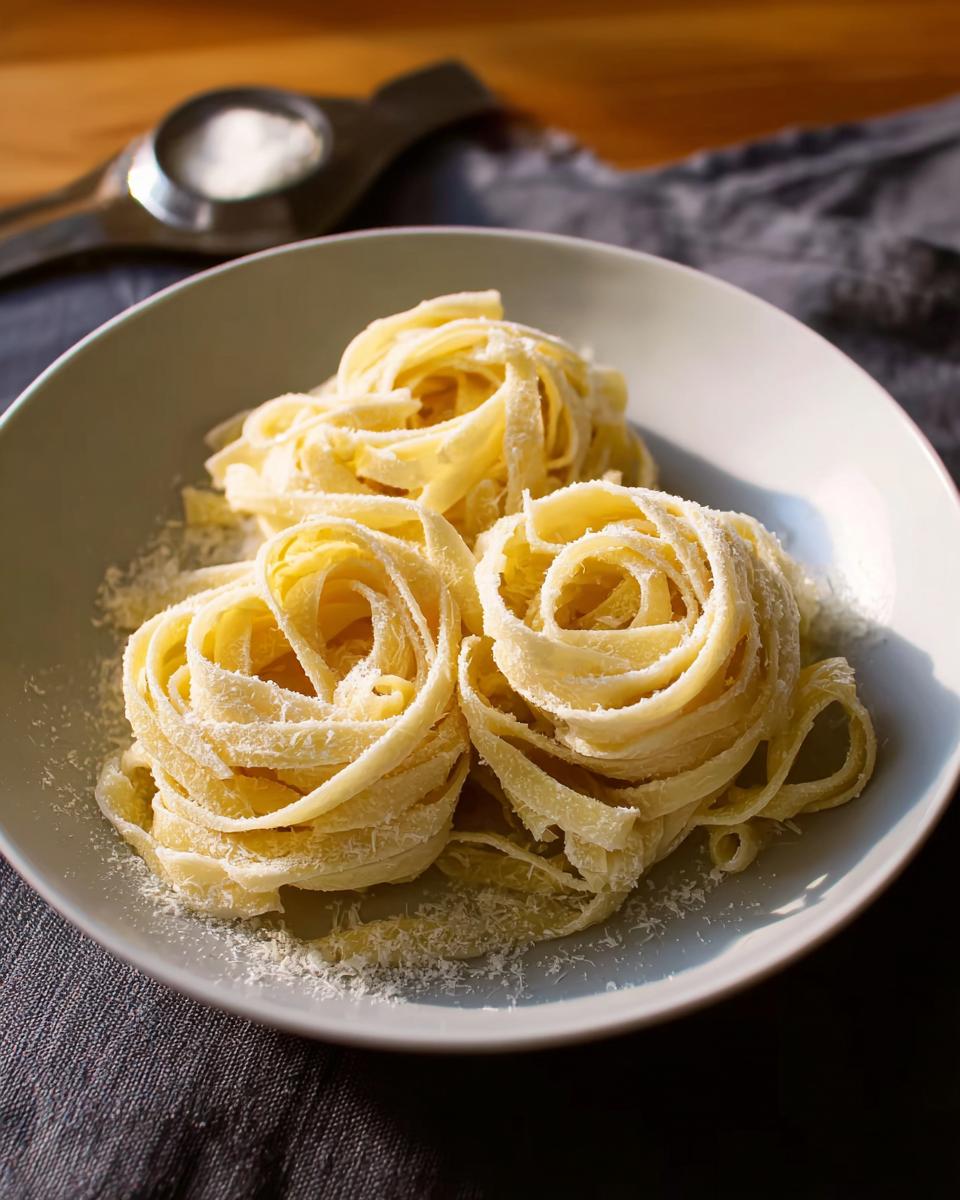
Once your dough is rolled nice and thin, it’s time to cut! If you’re using a pasta maker, switch to your desired cutter attachment (fettuccine, spaghetti, whatever your heart desires!). Feed the dough through gently. If you’re cutting by hand, fold the long sheets of pasta loosely, about three layers thick, and use a really sharp chef’s knife to cut it into your preferred noodle width. Dust the cut noodles lightly with flour, and then gently curl them into little nests. These can be placed on a parchment-lined baking sheet. If you’re not cooking them right away, you can totally freeze them on the baking sheet, then pop them into a freezer bag for up to 3 weeks!
Cooking Fresh Pasta Perfectly
Seriously, fresh pasta cooks in a flash! Get a big pot of water boiling and don’t be shy with the salt – it should taste like the sea! Drop your pasta nests in and give them a gentle stir. You’re looking for about 1.5 to 2 minutes, but really, it’s best to taste a strand. You want it to be perfectly al dente, meaning it has a lovely little bite to it. Drain it really well, and then toss it straight into your sauce!
Tips for Success with Homemade Pasta
Okay, so you’ve got the dough made and rolled, but here are a few little tricks I’ve picked up that really make a difference. These are the little things that take your homemade pasta from good to absolutely *amazing*. Don’t let these scare you though; they’re honestly just about paying a bit of attention to your dough. For more ways to bring that home-cooked magic into your kitchen, you’ll want to check out our guide to elevating your home cooking!
Don’t fear the flour: When you’re kneading or rolling, be generous with the flour on your work surface and your hands. It’s better to add a little extra than to have dough stick everywhere and become a sad, sticky mess. Just brush off any excess before you cook it. Also, when you’re rolling, keep the unused dough covered. It dries out surprisingly fast, and nobody wants dry, brittle pasta!
Feel the dough: Really get your hands in there! The dough should feel firm, smooth, and elastic. If it’s too wet, add flour a teaspoon at a time. If it feels too stiff and dry, a few spritzes from a spray bottle of water can work wonders. It’s all about finding that sweet spot.
Rest is best: That resting period is super important. It allows the gluten to relax, meaning your dough will be much easier to roll thin without snapping back. Don’t skimp on it!
Serving Suggestions and Quick Sauces
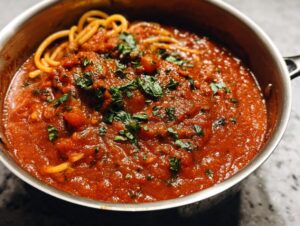
Okay, you’ve made this gorgeous, fresh pasta – now what? The best part is how incredibly versatile it is! It’s perfect for a quick and satisfying Family Dinner on a busy weeknight. Honestly, the pasta itself is the star, so you don’t need anything complicated. Think about pairing it with some super Quick Sauces. A simple lemon-butter sauce with a hint of garlic and maybe some shrimp (we have a great recipe right here!) is divine. Or even just a really good marinara or a sprinkle of Parmesan cheese will be absolutely wonderful. The possibilities are endless!
Frequently Asked Questions about Homemade Pasta
Got questions about whipping up your own pasta? It’s totally common when you’re trying something new! Here are some things folks often wonder about, and I’m happy to help clear them up so your pasta-making journey is as smooth as possible.
Can I use a different type of flour for homemade pasta?
You absolutely can! While all-purpose flour is my go-to for its reliability, you can experiment. Using ’00’ flour will give you a silkier texture, or a bit of semolina can add a nice chew, but be prepared to adjust liquids since they absorb differently.
How long does fresh pasta last?
Fresh pasta is best cooked the day you make it, but it’ll keep in the fridge for about 1-2 days if you store it properly – just dust it with a little flour, nest it, and pop it in an airtight container. For longer storage, freezing is your best friend!
What if my pasta dough is too sticky?
Oh, stickiness happens! Just take a deep breath and keep a little extra flour handy. Lightly dust your work surface and your hands, and continue kneading. The gluten will help it come together. If it’s really gummy, adding just a tiny bit more flour, a teaspoon at a time, usually does the trick.
Can I make this pasta recipe ahead of time?
Yes, you totally can! You can make the dough and let it rest, then wrap it well and keep it in the fridge for up to 24 hours before rolling and cutting. Or, cut your pasta into nests and freeze them!
Nutritional Information
Just a heads-up, the nutrition facts for homemade pasta can really vary depending on exactly how you make it and what you serve it with! This info is just an estimate per serving of plain pasta dough. So, for our delicious pasta recipe, expect roughly: Calories: 450-550, Fat: 15-20g, Protein: 18-22g, Carbs: 70-80g. It’s all part of the delicious homemade goodness!
Share Your Homemade Pasta Creations!
Now that you’ve made some gorgeous homemade pasta, I’d absolutely LOVE to see it! Leave a comment below, give this recipe a star rating, or tag me on social media with your pasta masterpieces. Your creations inspire me, and it’s so much fun seeing how everyone puts their own spin on things. If you have any more questions, don’t hesitate to reach out via our contact page!

Homemade Pasta
Ingredients
Equipment
Method
- To Make the Dough: On a large, clean work surface, pour flour in a mound. Make a well in the center about 4 inches wide. Pour whole eggs, egg yolks, and salt into well and, using a fork, beat thoroughly. When combined, gradually incorporate flour into the eggs until a wet, sticky dough has formed.
- Using a bench knife, scrape excess dough from fork and fingers. Begin to fold additional flour into the dough with the bench knife, turning the dough roughly 45 degrees each time, until dough feels firm and dry, and can form a craggy-looking ball, 2 to 5 minutes.
- Press the heel of your hand into the ball of dough, pushing forward and down. Rotate the ball 45 degrees and repeat. Continue until dough develops a smooth, elastic texture similar to a firm ball of Play-Doh. If dough feels too wet, add flour in 1 teaspoon increments. If dough feels too dry, add water slowly using a spray bottle.
- Wrap ball of dough tightly in plastic wrap and rest on countertop for 30 minutes.
- To Roll the Pasta: Meanwhile, place a sheet of parchment paper on a tray or cutting board and dust lightly with flour. Unwrap rested dough and cut into quarters. Set one quarter on work surface and re-wrap remaining dough. With a rolling pin, flatten the quarter of dough into an oblong shape about 1/2 inch thick.
- Set pasta maker to widest setting and pass dough 3 times through the machine at this setting.
- Place dough on a lightly floured work surface. Fold both ends in so that they meet at the center of the dough, and then fold the dough in half where the end points meet, trying not to incorporate too much air into the folds. Using rolling pin, flatten dough to 1/2-inch thick. Pass through the rollers 3 additional times.
- Narrow the setting by 1 notch and repeat Step 7. Repeat once more (the dough should now have passed through the third widest setting). Continue passing the dough through the rollers, reducing the thickness by 1 setting each time until it reaches the desired thickness. It should now be very delicate and elastic to the touch, and slightly translucent.
- Place rolled dough onto a work surface or baking sheet lightly dusted with flour or lined with parchment paper, folding the dough over as necessary so that it fits; sprinkle with flour or line with parchment between folds to prevent sticking.
- Cover dough with plastic wrap or a kitchen towel to prevent drying, then repeat Steps 5 through 9 with remaining dough quarters. If making noodles, cut dough into 12- to 14-inch segments.
- To Cut Noodles: Adjust pasta machine to noodle setting of your choice. Working one dough segment at a time, feed dough through the pasta-cutter. Alternatively, cut folded dough by hand with a chef’s knife to desired noodle width.
- Divide the cut noodles into individual portions, dust lightly with flour, and curl into a nest. Place on parchment-lined rimmed baking sheet and gently cover with kitchen towel until ready to cook. Pasta can be frozen directly on the baking sheet, transferred to a zipper-lock freezer bag, and stored in the freezer for up to 3 weeks before cooking. Cook frozen pasta directly from the freezer.
- To Cook: Bring a large pot of salted water to a rolling boil. Add pasta, stir gently with a wooden spoon, chopsticks, or a cooking fork, and cook, tasting at regular intervals until noodles are just set with a definite bite, about 1 1/2 to 2 minutes. Drain, toss with sauce, and serve.
Notes
Tried this recipe?
Let us know how it was!Maya Stevens is an accomplished culinary writer dedicated to empowering everyday cooks with skills, confidence, and flavor-forward inspiration. With years of experience developing approachable, well-tested recipes, Maya has become known for her warm teaching voice and her ability to transform simple ingredients into memorable, soul-satisfying meals. Today, she proudly contributes to sauvro.com, where she creates trusted recipes designed for real kitchens, real schedules, and real life.
Maya’s culinary journey began in boutique cafés and small farm-to-table kitchens, where she first discovered her love for seasonal cooking, experimentation, and scratch-made food. After working her way up through kitchen roles and earning a reputation for her thoughtful approach to flavor, she shifted her focus toward culinary media and recipe writing. This transition allowed her to reach home cooks on a larger scale—teaching, inspiring, and sharing the techniques she once used behind the line.
Throughout her career, Maya has collaborated with food startups, local chefs, and kitchenware brands to develop recipes, educational resources, and digital cooking guides. Her work has been featured in online food communities and recipe roundups, celebrated for its clarity, creativity, and reliability. Whether she’s crafting a weeknight meal, a comforting classic, or a fresh twist on a familiar dish, Maya is committed to developing recipes that work the first time and make home cooks feel proud of what they create.