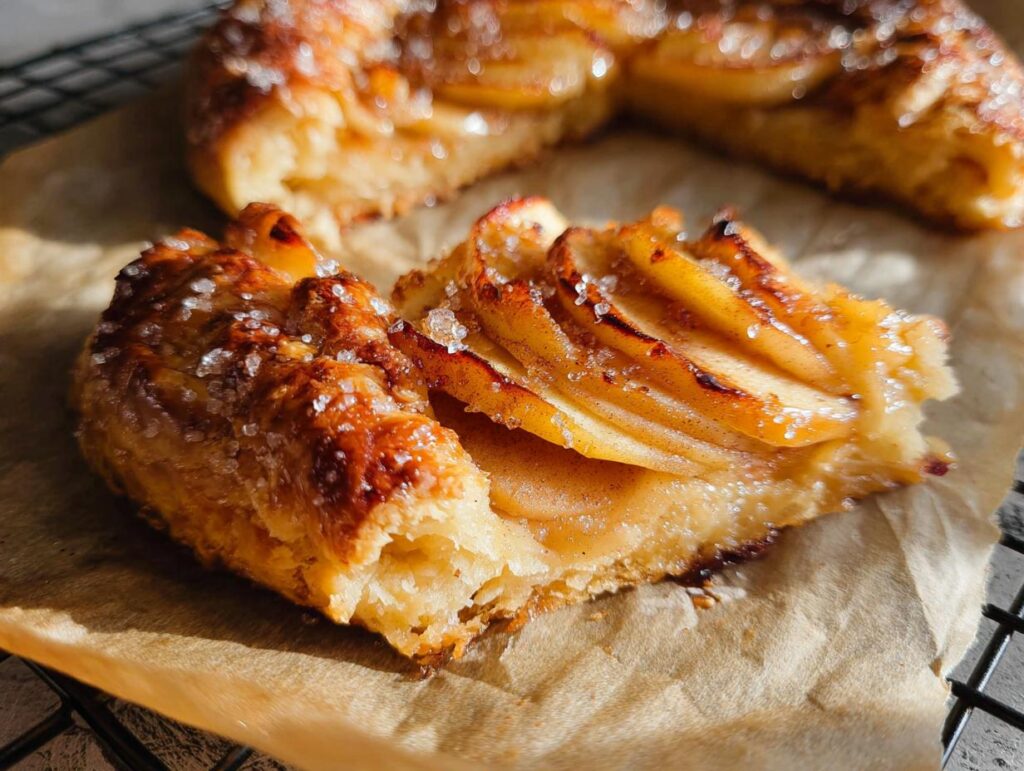
You know, there’s something truly special about digging into a dessert that feels like a warm hug from the past, right? But what if that hug came with a playful wink and a brand-new surprise? That’s exactly what I love about playing with Traditional Desserts With Modern Twists. It’s about taking those beloved classics, the ones that whisper stories of grandma’s kitchen, and giving them a little… well, *oomph*! Like one night, I was messing around with a simple fruit tart, just trying to shake things up after a long shift. I added some lemon zest and a tiny bit of ginger syrup to the usual custard, and wow! It was still that comforting, familiar dessert, but with this unexpected brightness that just made it sing. That moment really clicked for me: you can honor tradition without being stuck in it. It’s that sweet spot between the cozy and the exciting, and believe me, this Rustic Apple Galette is the absolute perfect example of that balance.
Why You’ll Love This Rustic Apple Galette
-
Seriously Easy, Seriously Delicious: Forget fussy pie crusts and complicated steps. This galette is all about that beautiful, rustic charm, meaning imperfect is actually *perfect*! You get all the incredible apple pie flavor with way less stress.
-
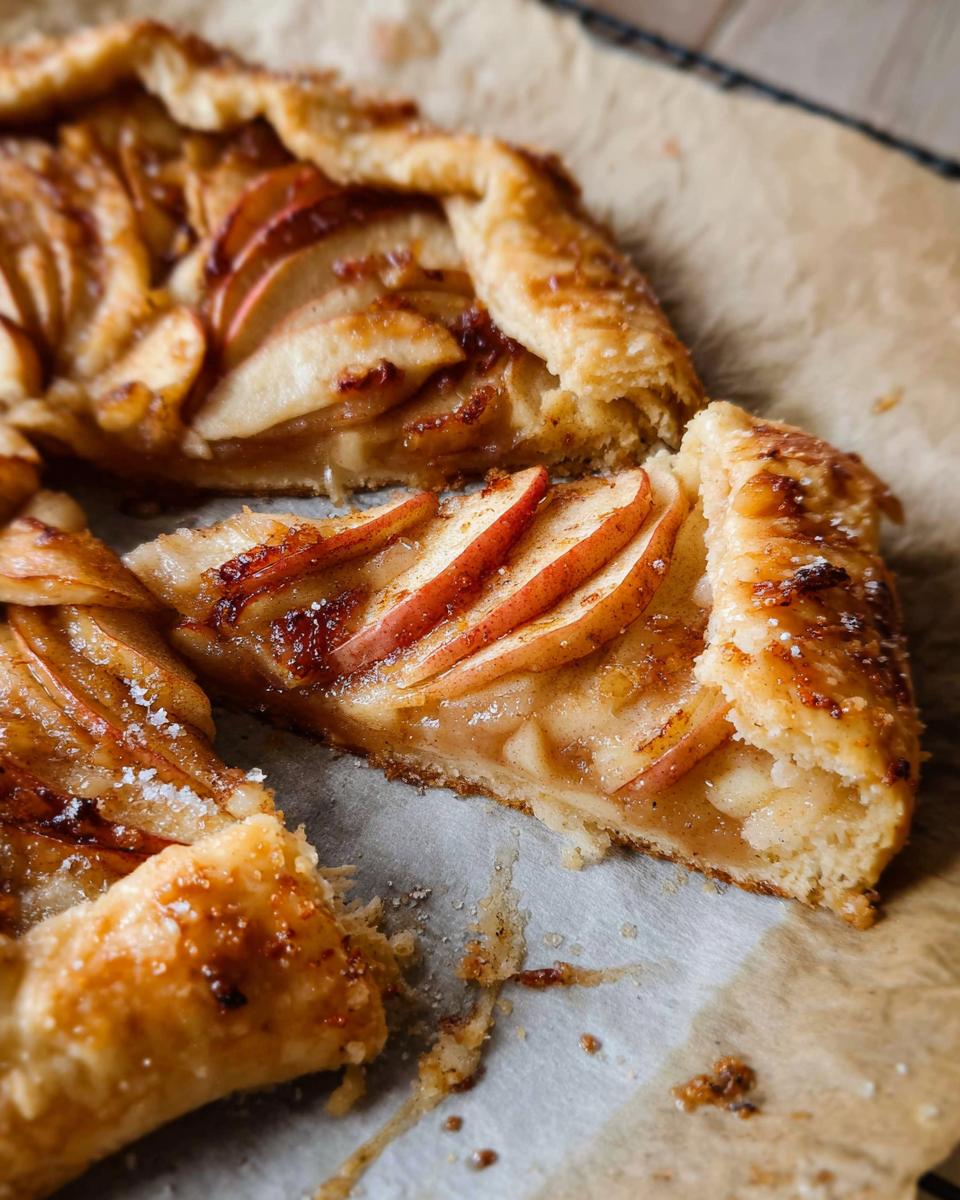
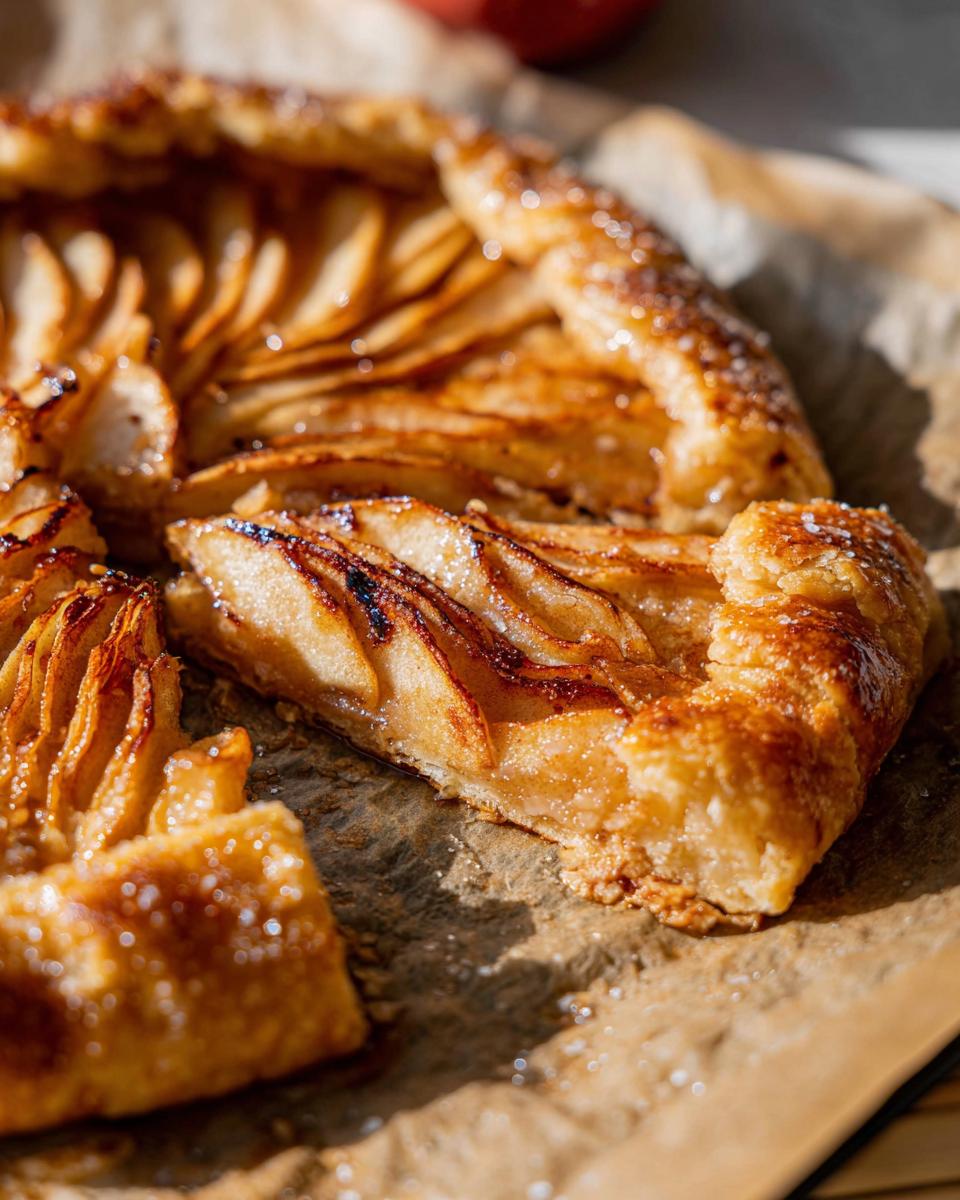
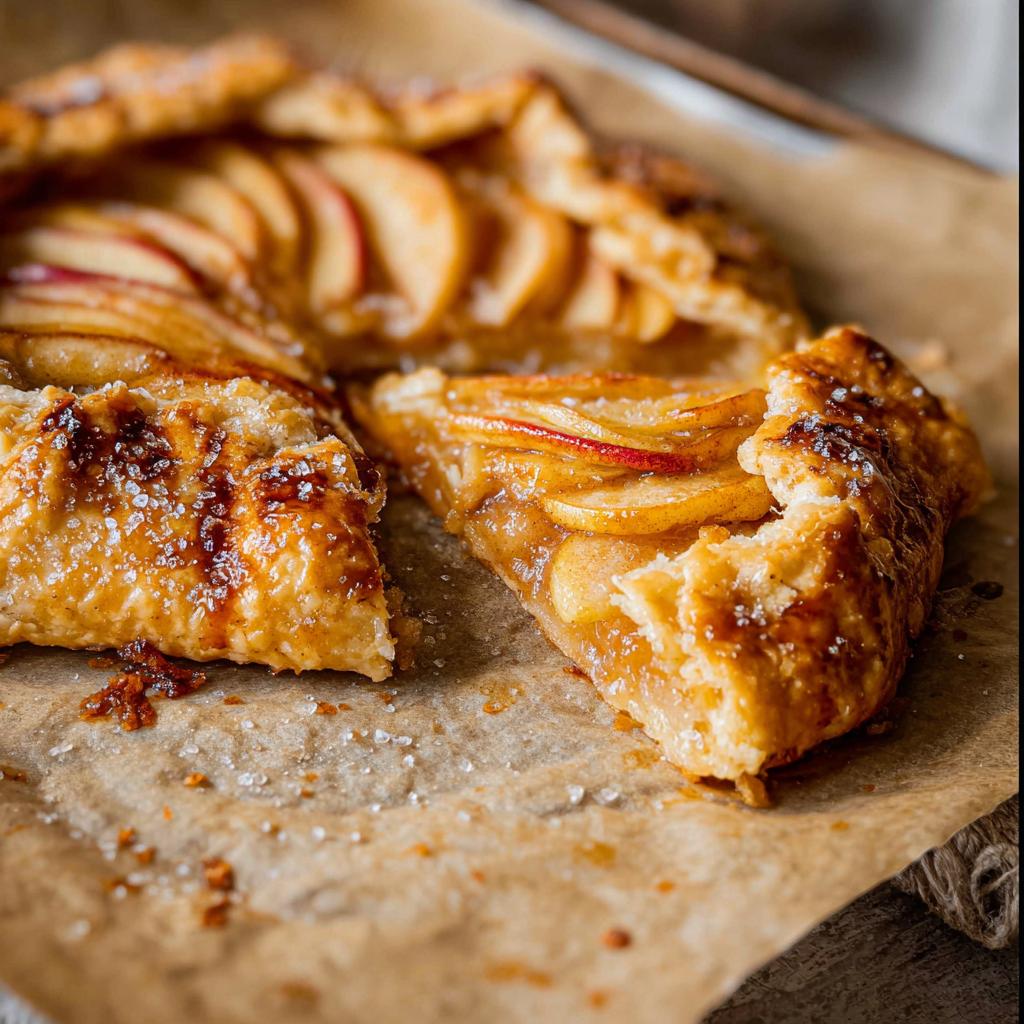
Cozy Comfort with a Kick: It’s that classic apple dessert we all adore, featuring that comforting blend of tender, spiced apples. But the hint of coarse sugar and the stunning, freeform crust give it a lovely, modern edge that feels special.
-
Fantastic for Any Occasion: Whether it’s a weeknight treat or a party showstopper, this galette always impresses. It looks so elegant on a plate, but honestly, it couldn’t be simpler to whip up.
-
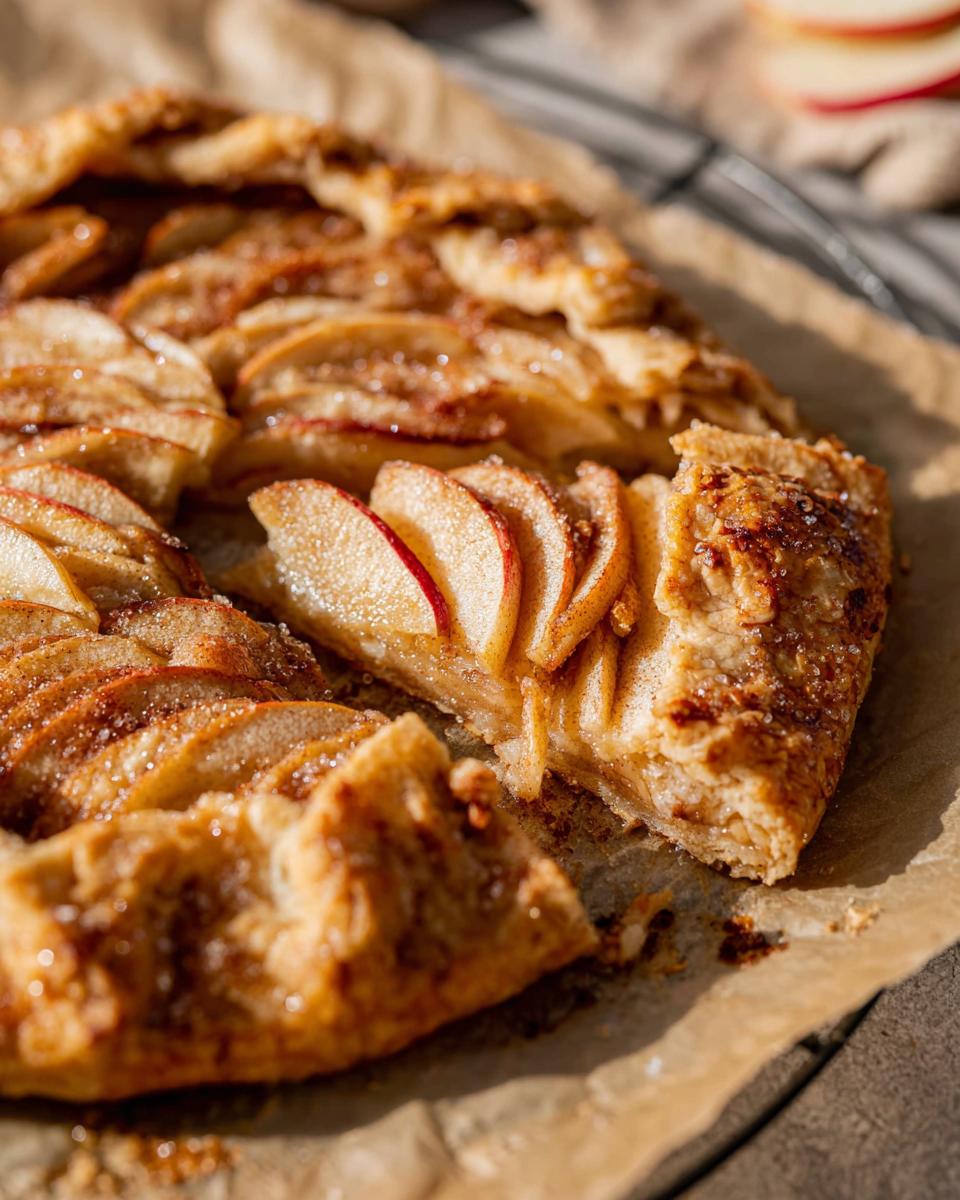
Crowd-Pleaser Guaranteed: Seriously, who can resist flaky, buttery pastry bursting with warm, sweet apples? It’s a winner every single time, appealing to both traditionalists and those looking for something a little more unique.
Ingredients for Your Traditional Desserts With Modern Twists
Alright, let’s talk ingredients! This galette is all about making a classic shine with that little twist we’re going for. Don’t be intimidated by the list; it’s all pretty straightforward stuff. Trust me, the magic is in how these simple things come together!
For the Crust:
- 1 stick unsalted butter, really cold and cut into little cubes (this is key for flakiness!)
- 1 teaspoon salt
- 1 cup sour cream (this makes it so tender!)
- 2 cups all-purpose flour
- 1 tablespoon granulated sugar
For the Filling:
- 4 medium apples – I love using Royal Gala, Golden Delicious, or Jonagold. Just slice ’em up thin!
- 2 teaspoons cornstarch (just a little to help thicken things up)
- ¼ cup coarse sugar, like demerara. It gives this amazing little crunch!
- 2 tablespoons unsalted butter, also cold
- 2 teaspoons cinnamon
- 1 egg yolk, beaten (for that gorgeous golden wash)
- A few ice cubes (sounds weird, I know, but it helps keep the dough cold!)
Essential Equipment for a Perfect Galette
You don’t need a fancy arsenal for this one! Just grab a couple of basics:
- A nice big bowl for mixing
- A pastry blender or even just a fork works fine
- Plastic wrap for chilling that gorgeous dough
- A baking sheet lined with parchment paper – makes cleanup a breeze!
How to Make Traditional Desserts With Modern Twists: Step-by-Step
Preparing the Galette Dough
First things first, we need that amazing, flaky crust. In a big bowl, just whisk together your flour, a pinch of salt, and granulated sugar. Then, toss in that super cold, cubed butter. Work it in with a pastry blender or even just your fingertips until it looks like coarse crumbs. Now, stir in that sour cream until it just starts to come together into a shaggy ball. It might seem a little wet, but that’s what gives it tenderness! Divide the dough in half, shape each into a disc, wrap them up tight in plastic wrap, and chuck ’em in the fridge for at least 45 minutes. This chilling time is super important for flakiness! Learning how to make dessert recipes like a pro with a perfect crust really starts here.
Assembling Your Rustic Apple Galette
While the dough chills, let’s get those apples ready. Slice about 4 medium apples nice and thin – maybe 1/8 inch thick. I like to give them a little squeeze of lemon and cover them with a damp towel so they don’t get all brown and sad. Now, grab one dough ball from the fridge (you can keep the other for later!), unwrap it, and plop it onto a sheet of parchment paper. Roll it out into a rough circle, about 10 inches wide. Don’t stress about perfect circles; uneven is good here! Slide that parchment with the dough onto your baking sheet. Sprinkle about a teaspoon of cornstarch in the center – it helps absorb any extra juice. Arrange your apple slices in overlapping patterns over the cornstarch, leaving a good 1.5 to 2 inches bare around the edge. Sprinkle the apples with cinnamon (about a teaspoon works nicely), then pop a few ice cubes right on top of the apples. Fold that outer crust edge up and over the apples, pleating as you go. Brush the folded crust generously with that beaten egg yolk for an amazing golden finish, and then sprinkle the whole galette, apples and all, with that delightful coarse sugar.
Baking and Finishing Touches
Now for the fun part! Get your oven preheated to 350°F (that’s about 175°C). Once it’s good and hot, carefully slide that beautiful galette in. Let it bake for about 40 to 50 minutes. You’re watching for those crust edges to turn a gorgeous, deep golden brown – that’s your sign it’s ready! When it comes out, let it cool down a bit. As for serving? It’s absolutely delicious all by itself. But if you want to take it up a notch, a little drizzle of caramel sauce and a scoop of vanilla bean ice cream on the side is pure perfection. To get more tips on making desserts like a pro, check out how to make dessert recipes like a pro!

Tips for Success with Traditional Desserts With Modern Twists
Okay, so you’ve got the recipe, but let me give you a couple of little secrets that really elevate your Traditional Desserts With Modern Twists game. These aren’t in the main steps, but they make a *huge* difference. First off, about those apples: don’t just slice ’em and forget ’em! Give them a little tumble with a pinch of brown sugar and a whisper of nutmeg along with the cinnamon. It really deepens their flavor and makes them even more tender. It’s a super small step, but it takes that cozy apple flavor to a whole new level. Also, when you’re rolling out the dough, if it starts feeling too warm and sticky, just wrap it up again and pop it back in the fridge for 10-15 minutes. Working with cold dough is key for that super flaky crust we all dream about!
And if you ever feel like your desserts are a little… well, *plain*? Check out this guide on simple, no-fuss desserts. It’s full of little gems that can totally spark your creativity for your next bake!
Ingredient Notes and Substitutions
Let’s chat a bit about these ingredients to make sure you get the best possible galette! For the apples, I really love using varieties like Gala, Golden Delicious, or Jonagold because they hold their shape beautifully and have a nice balance of sweet and tart. If you can’t find those, a firm, baking-friendly apple will still work great. For the coarse sugar, something like demerara or turbinado really gives that lovely little crunch on top, but regular granulated sugar will do in a pinch. If you’re out of sour cream for the crust, full-fat Greek yogurt is a fantastic switch – it adds a similar tang and moisture. And for that egg wash, if you’re keeping things vegan, a little plant-based milk mixed with a tiny bit of maple syrup gives a nice sheen!
Frequently Asked Questions About Traditional Desserts With Modern Twists
Got questions about whipping up some amazing Traditional Desserts With Modern Twists? I’ve got you covered!
Can I use different fruits in this galette?
Absolutely! This galette is super forgiving. Try pears, peaches, or even berries! Just make sure to adjust the sugar and spices a bit depending on how sweet your fruit is.
How do I store leftover galette?
Leftovers? Lucky you! Just wrap the cooled galette tightly in plastic wrap or pop it in an airtight container. It’s best enjoyed within 2-3 days. You can gently reheat it in a low oven to crisp up the crust again!
What makes this a ‘modern twist’ on a traditional dessert?
It’s all about that perfect balance! We’re keeping the comforting, classic apple filling and the idea of a rustic dessert, but the super easy, no-fuss dough and the beautiful freeform shape really give it that modern, effortless vibe. Plus, that sprinkle of coarse sugar adds a fun little texture!
Estimated Nutritional Information
Okay, so here’s the deal with nutrition info: this is just a rough estimate, and it’ll totally depend on the exact brands and ingredients you use. But, generally speaking, one serving of this gorgeous Rustic Apple Galette is somewhere around 350-400 calories, with about 20-25g of fat, a good dose of carbs, and maybe 4-5g of protein. Enjoy every bite!
Share Your Traditional Desserts With Modern Twists Creations!
I absolutely love seeing how you all put your own spin on these Traditional Desserts With Modern Twists! Did you try a different fruit? Add a secret spice? I’d be thrilled if you left a comment below telling me all about your galette adventures, or even better, share a picture on social media! Tag me so I can see your amazing creations. And if you loved this recipe, please consider giving it a star rating – it really helps out! If you have any questions or want to share more, you can always reach out too!
Rustic Apple Galette
Ingredients
Equipment
Method
- In a large bowl, combine the flour, sugar, and salt.
- Cut the butter into the flour with a pastry blender or pulse in a food processor until the mixture is crumbly.
- Add the sour cream and stir until the batter comes together into a ball. You can also use a food processor.
- Divide the dough ball into 2 equal pieces and roll them into balls. Wrap each ball tightly with plastic wrap and refrigerate for 45 minutes.
- Slice the apples about ⅛-inch thick. Drizzle them with lemon juice to keep them from browning. Cover the sliced apples with a wet kitchen towel while you prepare the crust.
- Preheat your oven to 350°F.
- Remove one dough ball from the refrigerator. You can store the other dough ball in the fridge for up to 4 days.
- Unwrap the dough ball and place it on a sheet of parchment paper.
- Roll the dough out into a flat circle, about 10 inches across. Sprinkle a little flour on top if needed to prevent sticking. Uneven edges are fine for a rustic look. If the dough becomes sticky, return it to the refrigerator for a bit.
- Transfer the dough on the parchment paper onto a baking sheet. Sprinkle cornstarch all over the center of the dough, about 1 teaspoon per galette.
- Arrange apple slices in the middle of the galette, leaving about 1 ½ to 2 inches of the outer edges unfolded.
- Dust the apples with cinnamon, about 1 teaspoon per galette.
- Top with a few cold ice cubes.
- Fold in the edges and generously brush with the beaten egg yolk.
- Sprinkle the coarse sugar over the top of the galette.
- Bake for 40 to 50 minutes, until the edges are beautifully golden brown.
- Remove from the oven and let cool. Enjoy as is, or top with caramel sauce and/or vanilla bean ice cream.
Notes
Tried this recipe?
Let us know how it was!Noah Clark is a skilled Recipe Developer, culinary writer, and food-education enthusiast dedicated to helping home cooks create bold, memorable meals without unnecessary complexity. Known for his clear teaching style, smart technique breakdowns, and modern approach to flavor, Noah has earned the trust of readers who want recipes that are both inspiring and achievable. Today, he proudly contributes to sauvro.com, where he develops reliable, flavor-driven recipes designed for real home kitchens.
Noah’s culinary journey began in independent cafés and farm-to-table restaurants, where he learned the foundations of scratch cooking, seasonal ingredients, and flavor balance. After progressing from prep cook to kitchen lead, he discovered that his true passion was not only cooking—but teaching others how to cook well. Motivated by that mission, he transitioned into culinary content and digital recipe development, combining food knowledge with a talent for communication and instruction.