Okay, let’s talk stuffing! For so many of us, a holiday table just isn’t complete without it. It’s that warm, comforting, savory hug in a dish. But have you ever ended up with stuffing that’s either too mushy or drier than the Sahara? Yeah, me too! That’s why learning How To Make Stuffing Recipes Like A Pro is such a game-changer. It’s all about getting that perfect balance: the ideal texture, just enough moisture, and a flavor explosion that makes everyone ask for seconds.
I remember my first real Thanksgiving in a busy restaurant kitchen. I thought stuffing was just bread and broth. Then one of the chefs told me to “listen to it” as it cooked. I was so confused! But then he explained that the sizzle, the smell of the herbs, even the sound of the spoon hitting the pan–they all tell you when something’s just right. That was it for me. Stuffing became more than just a recipe; it was about paying attention, about those little intuitive moments. And that’s what I want to share with you today. Cooking with care, not just perfection, is the real secret. Want to elevate your home cooking? Check out sauvro.com for more inspiration!
Why You’ll Love This How To Make Stuffing Recipes Like A Pro Guide
Trust me, mastering this stuffing is easier than you think, and the payoff is HUGE! Here’s why you’re going to love digging into this recipe:
- Effortless Elevation: We break down How To Make Stuffing Recipes Like A Pro so it feels totally doable, even if you’re not a seasoned chef.
- Flavor Packed: Get ready for a wave of deliciousness with fresh herbs, perfectly sautéed aromatics, and the best savory broth.
- Texture Perfection: Say goodbye to mushy or dry stuffing! We’re talking a delightful balance of tender bread and a slightly crisp top.
- Impress Your Guests: Seriously, this stuffing looks and tastes gourmet, making it a star holiday side dish.
- Customizable Fun: While this recipe is amazing as-is, it’s also a fantastic base for your own creative twists.
Essential Ingredients for Gourmet Stuffing
Alright, let’s get down to business! To make stuffing that truly sings, you need the right players on your team. This isn’t just about throwing bread and broth together; it’s about quality and freshness. Here’s what you’ll need to get that amazing gourmet stuffing:
For the Stuffing Base
- 1 loaf sourdough, Italian, or French bread: You want about a pound of this, and it’s best if it’s a little stale or dried out. Don’t go for the super soft stuff!
- 2 medium yellow onions: Aim for about 3 cups once you dice them up. They give such a wonderful sweetness.
- 4 medium stalks celery: About 1 1/4 cups diced. Celery adds that perfect crisp texture and a little savory depth.
- 4 cloves garlic: Mince these up nice and fine. Garlic is non-negotiable for flavor!
- 1 small bunch fresh sage leaves: You’ll need about 2 tablespoons chopped. Fresh sage is just… *chef’s kiss*.
- 1 small bunch fresh thyme sprigs: Get about 3 tablespoons of leaves chopped. Thyme brings this earthy, wonderful aroma.
- 1/2 medium bunch fresh parsley leaves: Roughly 1/4 cup chopped, plus a little extra for garnish later. Parsley brightens everything up.
- 6 tablespoons unsalted butter: We’ll divide this up – some for the veggies, some to dot on top. And don’t forget a little extra for buttering the dish!
For the Binder and Seasoning
- 2 1/2 cups low-sodium turkey, chicken, or vegetable broth: Divided. Using low-sodium is smart so you can control the saltiness yourself.
- 3/4 teaspoon kosher salt: Divided. Kosher salt has a cleaner taste, perfect for stuffing.
- 2 large eggs: These are key for binding everything together beautifully.
- 1/2 teaspoon freshly ground black pepper: For that little kick!
Expert Tips for How To Make Stuffing Recipes Like A Pro
So, you want to make stuffing that wows everyone, right? It’s not just about following a recipe; it’s about knowing a few little tricks that make all the difference. When you nail these, you’re basically making stuffing like a pro! It all comes down to a few key things: the bread you use, making sure your herbs are super fresh, and picking a good quality broth. Small details, HUGE impact!
Think of it like this: a great car still needs good tires to perform its best. Well, great stuffing needs the right foundation and the right flavor boosters. These little touches will make your stuffing shine, whether it’s Thanksgiving, Christmas, or just a Tuesday you want to make special. Ready to learn them? You can find more tips on refining your cooking at sauvro.com.
Choosing the Right Bread for Your Stuffing
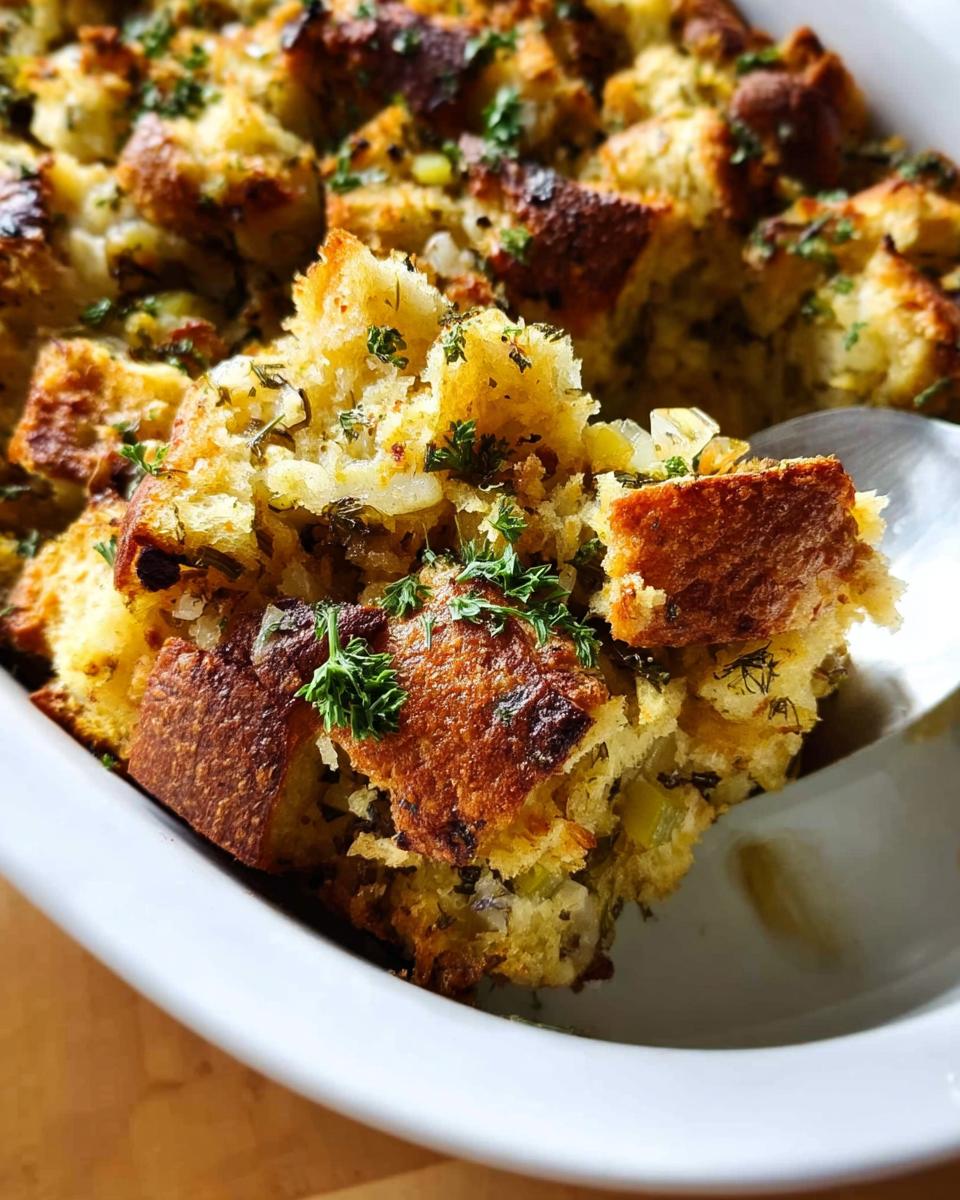
Okay, bread choice is HUGE one. Forget those super soft, squishy sandwich slices – they just turn into mush. You want something with a bit of structure. Think sourdough, a good Italian loaf, or even a classic French baguette. The key is it needs to be a day or two old, or better yet, dried out a bit. This gives it that sturdy texture so it holds up when you add the liquids. It creates those delicious little crispy bits on top and keeps the inside tender, not soggy. It’s all about that perfect bite!
Achieving the Perfect Moisture Balance
This is probably the most important part of making perfect stuffing. Too little liquid and it’s dusty dry; too much and it’s a soupy mess. That’s where controlled amounts of broth and those eggs come in. The eggs act like a binder, holding everything together while adding richness. You want the bread to absorb the liquid but still have some chew. The goal is for it to be moist, absolutely, but still feel light and fluffy. Test it as you mix – the bread should be saturated, but you shouldn’t have a puddle at the bottom of the bowl. That internal temp check later is super important too!
Step-by-Step Instructions: How To Make Stuffing Recipes Like A Pro
Alright, ready to roll up your sleeves and make some truly spectacular stuffing? Following these steps is like getting a backstage pass to professional kitchens. Don’t worry, it’s totally approachable, and each step builds on the last to create that amazing flavor and texture. We’re going from simple bread cubes to a holiday showstopper!
Preparing the Bread Base
First things first, let’s get our bread ready. Preheat that oven to 350°F (175°C) nice and hot. Then, grab your bread and tear or cut it into roughly 1-inch pieces. Toss these cubes onto a baking sheet and let them dry out in the oven for about 30 minutes, until they feel lightly toasted and dry to the touch. This step is crucial for texture – it stops your stuffing from getting soggy!
Sautéing Aromatics and Herbs
Now for the flavor builders! Melt 4 tablespoons of butter in a big skillet over medium-high heat. Toss in your diced onions, celery, and garlic. We want to cook these until they’re nice and soft and just starting to get a little golden brown, about 8 to 10 minutes. Add a pinch of salt with them. Now, pour in about half a cup of broth and scrape up all those yummy brown bits stuck to the bottom of the pan – that’s pure flavor gold! Once that broth has reduced a bit, take the pan off the heat. Stir in your chopped sage, thyme, and parsley. Smell that? That’s the smell of greatness!
Combining and Baking the Stuffing
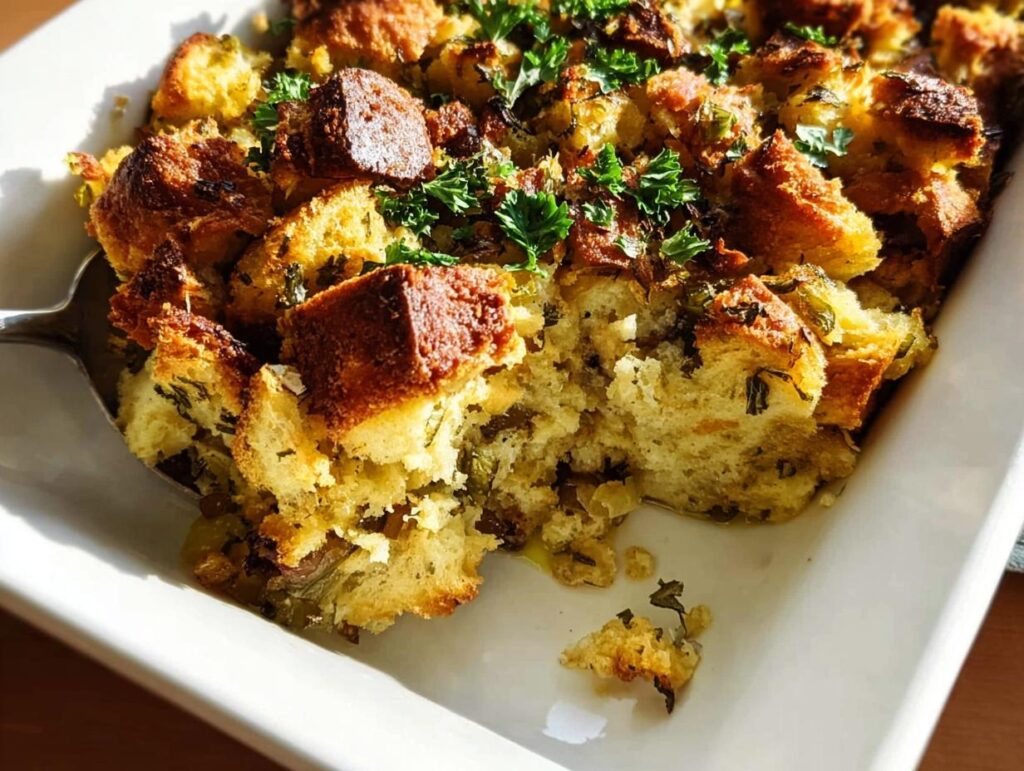
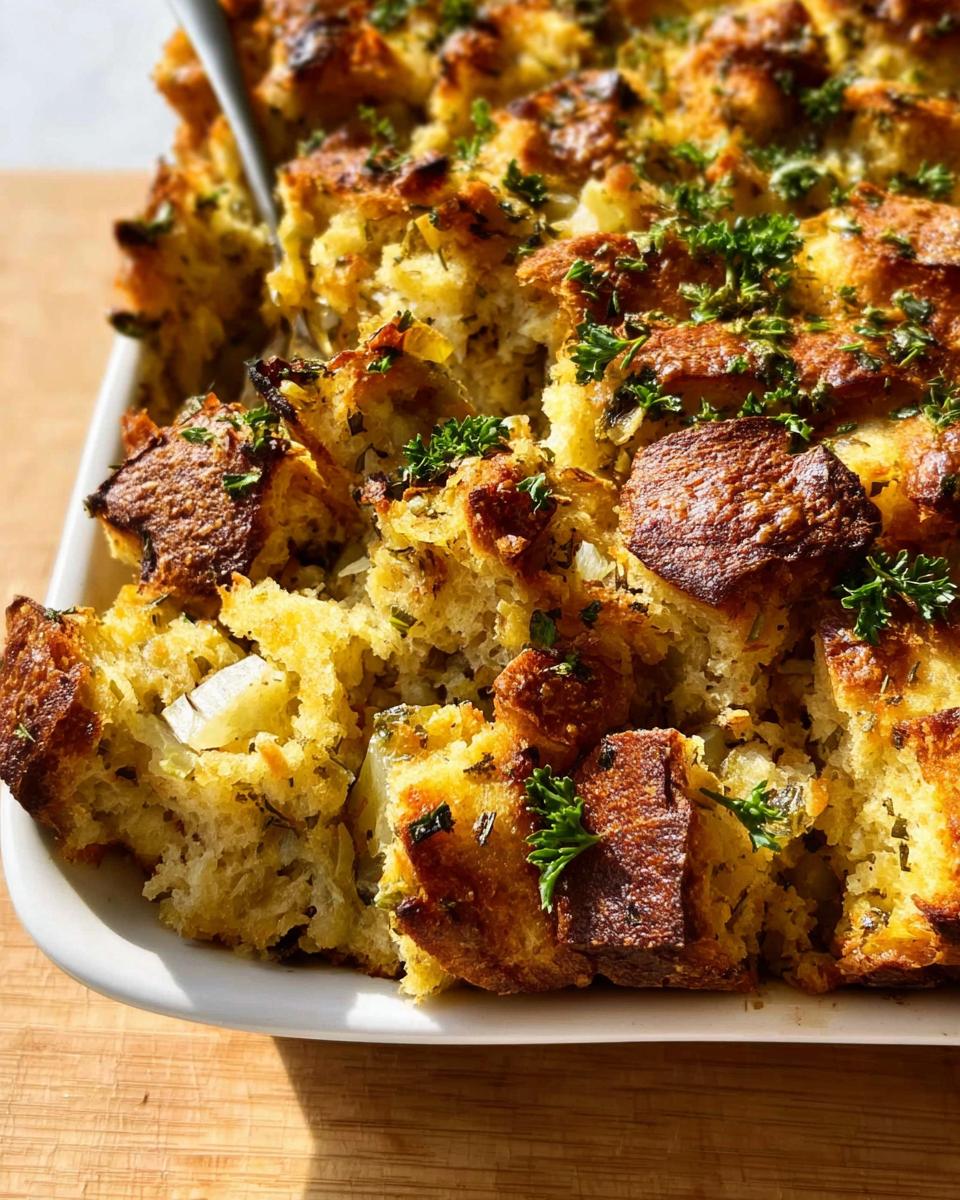
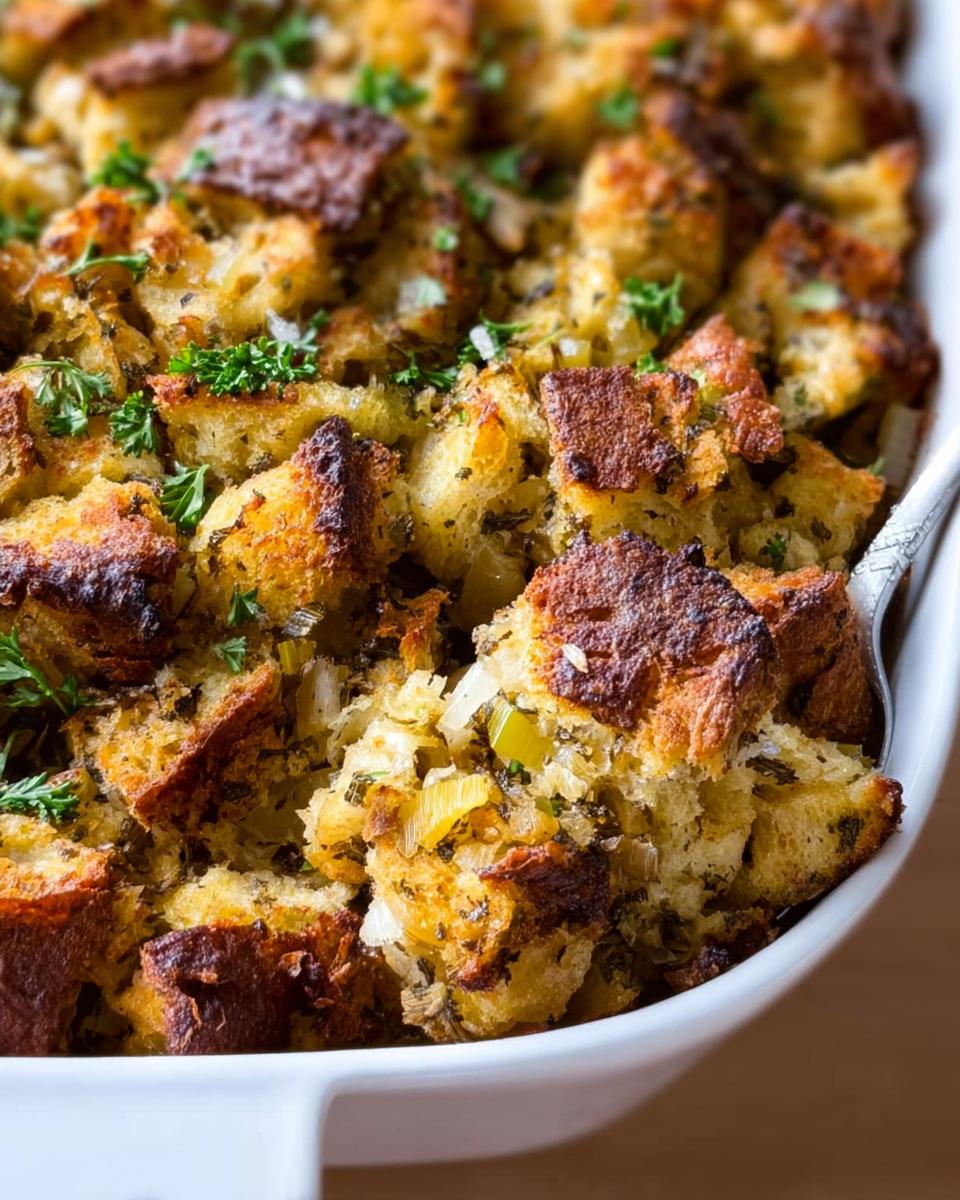
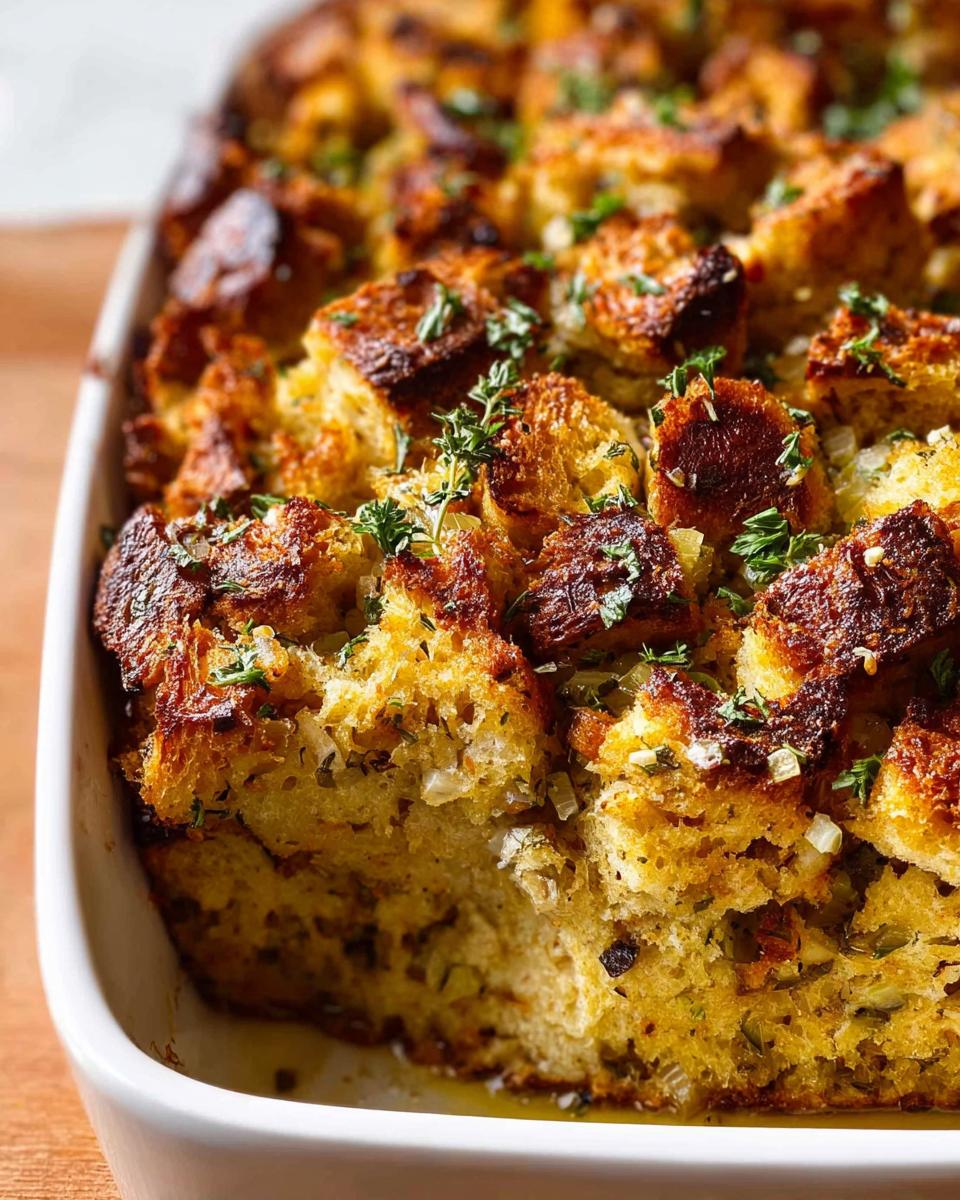
Time to bring it all together! In a large bowl, whisk up the rest of your broth (about 2 cups) with the eggs, the rest of the salt, and the black pepper. Add your dried bread cubes and that amazing onion-herb mixture into the bowl. Gently stir everything until the bread soaks up all that liquid. Don’t go crazy mixing, just enough to combine. Transfer this glorious mix to your buttered baking dish and spread it out evenly. Dot the top with the remaining 2 tablespoons of butter, cut into little pieces. Now, cover the dish tightly with foil. Pop it into the oven for 25 minutes. We want the inside to get nice and steamy and cook through. You’re looking for an internal temp of 155°F to 160°F with a thermometer. Once it hits that, take off the foil and bake for another 15 minutes, or until the top is perfectly golden brown and a little crispy. Pure magic!
Equipment Needed for Professional Stuffing
You don’t need a whole professional kitchen to make amazing stuffing, but having the right tools really helps! Grab a trusty 9×13-inch baking dish or something similar (about 3 quarts). A rimmed baking sheet is perfect for drying out your bread. You’ll also need a big skillet for sautéing those goodies, a large bowl for mixing it all up, and some aluminum foil to keep things moist while baking. And don’t forget an instant-read thermometer – it’s your best friend for knowing when it’s perfectly cooked!
Variations and Customizations for Homemade Stuffing
Okay, so this recipe is fantastic just as it is, but honestly, stuffing is one of those dishes where you can really have some fun and make it totally your own! It’s your chance to get creative and turn it into your signature holiday side dish. Think about adding some crunchy toasted pecans or walnuts, a handful of sweet dried cranberries or cherries, or even some crumbled cooked sausage or bacon for extra savory goodness. And cheese? Oh yeah, a little sprinkle of Gruyère or sharp cheddar melted on top can be divine! For more ideas on making meals your own, check out sauvro.com.
Adding Savory Bread Pudding Elements
If you’re leaning towards a richer, more bread-pudding-like texture, try adding an extra egg or even a splash more broth. Some people love to whisk in a bit of heavy cream or even some crème fraîche with the eggs and broth for an ultra-decadent binder. This makes it super moist and almost custardy, with that wonderful savory depth that makes a true bread pudding so irresistible.
Serving and Storage for Your Holiday Side Dishes
You’ve done it! Your stuffing is baked to golden-brown perfection. Serve it piping hot right out of the oven, garnished with a little extra fresh parsley for a pop of color. It’s truly the star of any holiday meal. Got leftovers? No problem! Let the stuffing cool completely, then tuck it into an airtight container in the fridge. It’ll keep well for about 3-4 days. When you’re ready to reheat, the best way to get that lovely texture back is to warm it gently in the oven, maybe covered for a bit first, then uncovered to crisp up the top again. Gives it a whole new life!
Frequently Asked Questions About How To Make Stuffing Recipes Like A Pro
Got questions about whipping up your best-ever stuffing? I get it! Lots of little things can trip you up, but don’t sweat it. We’re here to make sure your homemade stuffing is always a winner!
Can I use fresh bread for stuffing?
Technically, yes, but I really don’t recommend it if you want that perfect texture. Fresh bread tends to get way too mushy. If it’s all you have, try toasting it really well in the oven until it’s super dry – that’s the key!
How to make stuffing ahead of time?
Absolutely! You can totally prep your stuffing the day before. Just assemble it all in the baking dish (but don’t bake it yet!), cover it tightly, and pop it in the fridge. When you’re ready to bake, you might need to add a few extra minutes to the covered baking time to make sure it heats through properly.
What if my stuffing is too dry or too moist?
No worries! If it’s too dry, gently stir in a little more warm broth, a tablespoon at a time, until it loosens up. If it’s too wet, uncover it and bake it a bit longer to let some of that moisture evaporate. Sometimes a little extra toasting on top does the trick!
Nutritional Information
Just a heads-up, the numbers below are estimates and can totally change based on exactly what you use – like the type of bread or broth. But generally, one serving of this amazing stuffing comes in around 350 calories, with about 18g of fat, 10g of protein, and 30g of carbohydrates. It’s a hearty side dish, for sure, and worth every delicious bite!
Share Your Culinary Creations
So, how did your stuffing turn out? I’d absolutely LOVE to hear about it! Did you try any fun variations? Did it disappear faster than you could say “Happy Holidays”? Leave a comment below and let me know, or share your pics with us! You can also get in touch through our contact page. Your feedback helps make these recipes even better!

How to Make Stuffing Like a Pro
Ingredients
Equipment
Method
- Preheat your oven to 350°F (175°C). Butter a 9×13-inch or 3-quart baking dish.
- Tear or cut the bread into 1-inch pieces. Spread them on a baking sheet and bake until dry and lightly toasted, about 30 minutes. Let cool completely.
- Dice the onions and celery. Mince the garlic. Chop the sage, thyme, and parsley.
- Melt 4 tablespoons of butter in a skillet over medium-high heat. Add the onions, celery, garlic, and 1/4 teaspoon salt. Cook until softened and lightly golden, 8 to 10 minutes. Add 1/2 cup broth and cook until reduced by half, scraping up browned bits. Remove from heat, add herbs, and stir.
- In a large bowl, whisk together the remaining 2 cups broth, eggs, 1/2 teaspoon pepper, and remaining 1/2 teaspoon salt. Add the dried bread and the onion mixture. Stir until the liquid is absorbed.
- Transfer the mixture to the prepared baking dish and spread evenly. Dot the top with the remaining 2 tablespoons of butter, cut into small pieces. Cover tightly with foil.
- Bake covered for 25 minutes, or until an instant-read thermometer inserted into the center registers 155°F to 160°F (68°C to 71°C). Uncover and bake for another 15 minutes, or until the top is crisp and golden-brown.
Notes
Tried this recipe?
Let us know how it was!Noah Clark is a skilled Recipe Developer, culinary writer, and food-education enthusiast dedicated to helping home cooks create bold, memorable meals without unnecessary complexity. Known for his clear teaching style, smart technique breakdowns, and modern approach to flavor, Noah has earned the trust of readers who want recipes that are both inspiring and achievable. Today, he proudly contributes to sauvro.com, where he develops reliable, flavor-driven recipes designed for real home kitchens.
Noah’s culinary journey began in independent cafés and farm-to-table restaurants, where he learned the foundations of scratch cooking, seasonal ingredients, and flavor balance. After progressing from prep cook to kitchen lead, he discovered that his true passion was not only cooking—but teaching others how to cook well. Motivated by that mission, he transitioned into culinary content and digital recipe development, combining food knowledge with a talent for communication and instruction.